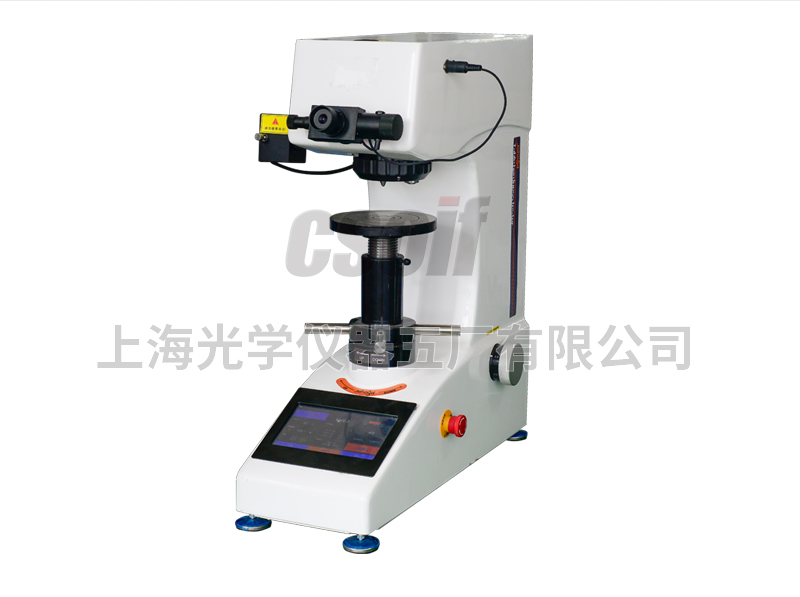
1. Purpose
Digital automatic turret type The Vickers hardness tester can meet the basic testing requirements of the Vickers hardness tester. The upgraded digital micrometer eyepiece can directly read the measurement length, so that the measured value can be obtained more quickly and accurately. The upgraded turret can automatically convert the eyepiece and the lens. The indenter can avoid damage to the instrument caused by manual errors, and also greatly improve the efficiency. The 7-inch LCD touch screen can provide more measurement data, and the control is more comprehensive and accurate. Can be used for steel, non-ferrous metals, metal foil, cemented carbide, sheet metal, microstructure, carbonization or carburizing, Nitriding and decarburization layer,Surface hardening layer, electroplating layer, coating, heat treatment and glass, wafer, ceramic materials, etc.
2. Features
1. The optical system designed by the senior optical engineer not only has clear images, but also can be used as a simple microscope with high brightness. Adjustable, visual comfort, long-term operation is not easy to fatigue.
2. The 7-inch touch screen can display the test method, test force, upper and lower limit of hardness value, measurement pressure Trace length, hardness value, test force holding time, measurement times and can enter year, month, date, test results and data processing, etc.;
3. The system has its own calibration function, and the input error can be manually adjusted for each test force to calibrate the instrument.
4. The adjustable range of optical system brightness: 0-100.
5. Maximum 100 sets of test data can be stored, and the average and test times data can be displayed on the main interface.
6. The test force unit can be manually converted to each other, and the conversion unit is: (Kgf, N)
7, The main interface can display 4 conversion scales at the same time, and can switch: national standard, American standard and international standard Standard, a total of 18 measurement scales can be converted: HRA, HRB, HRC, HRD, HRE, HRF, HRG, HRH, HRK, HR15N, HR30N, HR45N, HR15T, HR30T, HR45T, HV, HK, HBW.
8, Double objective lenses can measure hardness directly.
9, With diagonal length memory function, the diagonal length is automatically memorized after shutdown, and measured directly after startup , no need to reset twice.
10. The measuring ruler can be converted into HK Knoop hardness.
11. The test data can be directly exported through USB.
12. The upper and lower measurement ranges can be set and displayed on the main measurement interface.
13. The operating system can be converted between Chinese and English.
14. A built-in printer is optional, and the test data can also be output to a U disk via USB for storage and analysis.
15. HSVT-5Z model can be realistic: measure the length to directly confirm the hardness value.
16. HVST-5Z model can realize: the position switching of observation-test-measurement is completed by automatic turret.
17. The cast aluminum shell has a stable and non-deformed structure once formed, and the pure white car paint is of high grade and has strong scratch resistance. , it is still bright as new after many years of use.
18. Our company has the capability of R&D, design, production and processing. Our machines provide parts replacement and maintenance and upgrade services for life. .
Three, technical parameters
| Model | HVST-5Z | HVST-10Z | HVST-30Z | HVST-50Z | ||||||||
| Vickers hardness scale | HV0.3,HV0.5,HV1.0,HV2.0,HV3.0,HV5.0 | HV0.3,HV0.5,HV1.0,
HV3.0,HV5.0,HV10.0 |
HV1,HV3,HV5,HV10,HV20,HV30 | HV1 ,HV5,HV10,HV20,HV30, HV50 | ||||||||
| show | 5-digit hardness value, 4-digit diagonal length (D1, D2), holding time, number of tests, mean, standard deviation, return | |||||||||||
| Test force (Kgf) | 0.3, 0.5, 1.0, 2.0, 3.0, 5.0 | 0.3, 0.5, 1.0, 3.0, 5.0, 10.0 | 1.0Kgf(9.8N), 3.0Kgf(29.4N), 5.0Kgf(49.0N),10Kgf(98.0N), 20Kgf(196N), 30Kgf(294N) | 1.0Kgf(9.8N), 5.0Kgf(49.0N), 10Kgf(98.0N),20Kgf(196N), 30Kgf(294N), 50Kgf(490N) | ||||||||
| Load control | Automatic (load/hold/unload) | |||||||||||
| Test force holding time (s) | 1~99 | |||||||||||
| Optical channel | Dual optical channels (eyepiece and CCD camera channel) | |||||||||||
| Optical system | Objective lens: 10×, 20× (can be changed to 40X)Eyepiece magnification: 10×
Total magnification (μm): 100×, 200× Measuring range (μm): 400 Resolution (μm): 0.125 |
Objective lens: 10×, 20×Eyepiece magnification: 10× (can be changed to 15X)
Total magnification (μm): 100×, 200× (can be changed to 150X, 300X) Measuring range (μm): 400 Resolution (μm): 0.125 |
||||||||||
| Hardness measuring range | (5-3000)HV | |||||||||||
| XY test table (optional) | Dimensions (mm): 100×10
Stroke range (mm): 25×25 Minimum reading (mm): 0.01 |
|||||||||||
| Maximum height of specimen (mm) | 165 | |||||||||||
| Maximum width of specimen (mm) | 130 (distance from the center line of the indenter to the machine wall) | |||||||||||
| Data output (optional) | Built-in printer, test data can also be output to U disk via USB for saving and analysis | |||||||||||
| voltage | AC220V/50HZ | |||||||||||
| Dimensions (mm) | 585×200×630 | |||||||||||
| Weight (kg) | 42 | |||||||||||


