I. Purpose
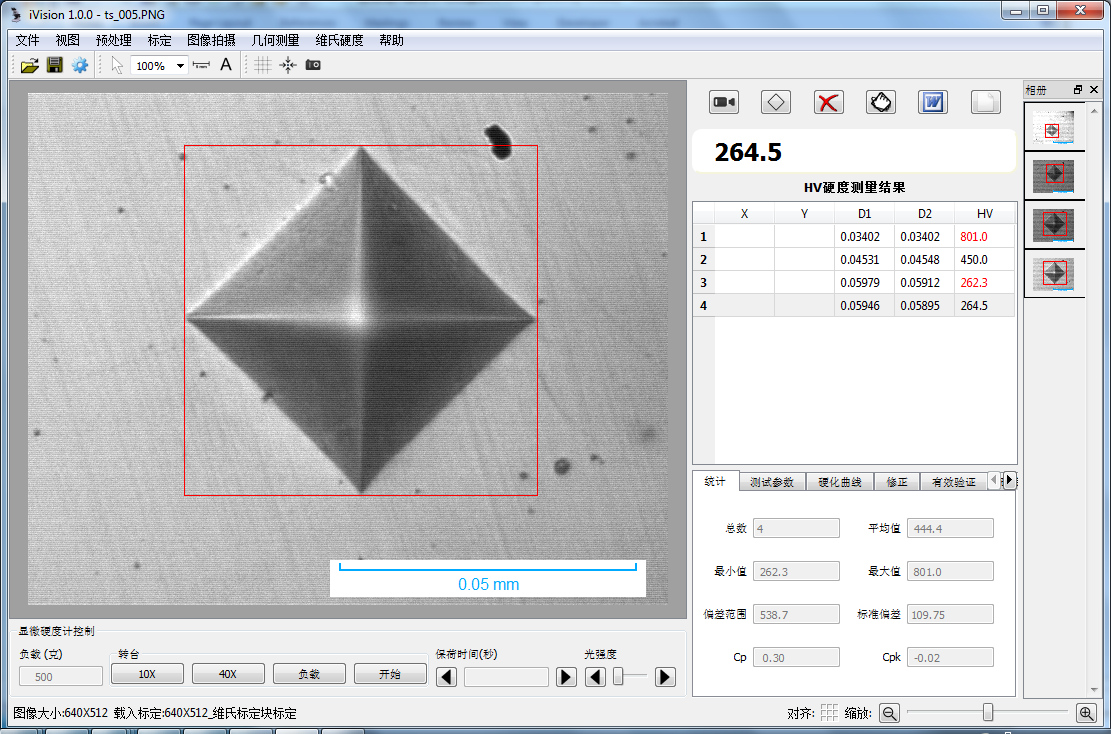
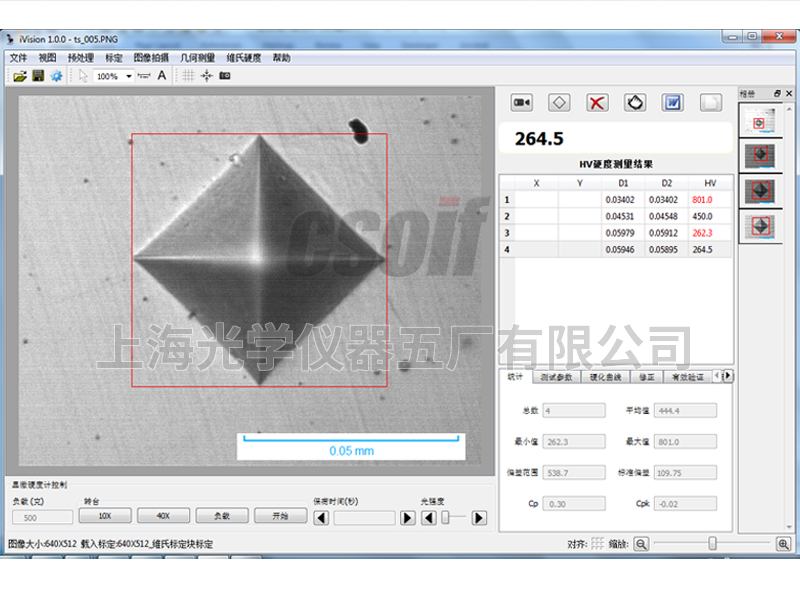
Automatic measurement: The system automatically finds the indentation vertex, measures the diagonal length and calculates the hardness value;
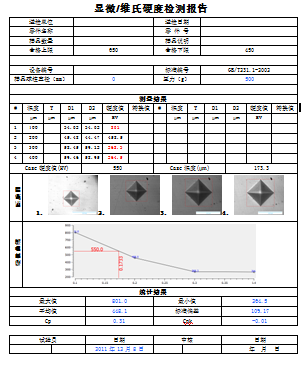
Hardening curve: The user manually enters the depth of the test point, and the software automatically draws the hardening curve and calculates the depth of the hardened layer. For convenience, users can save multiple depth points to a template file for calling during testing;
Hardness value conversion, correction, effective verification: The system can convert the measured micro-Vickers hardness value into other hardness values such as HB, HR, etc.; it can correct the measured value of spherical cylindrical samples; Effective verification of sample measurement values;
Data statistics: Automatically calculate the average, variance, Cp, Cpk and other statistical values of the measured hardness;
Auto alarm: Automatically mark out the upper and lower limit values;
Test report: Automatically generate WORD or EXCEL document report; the user can customize the report format; the standard format includes each individual hardness measurement value, statistical value, indentation image, and hardening curve, etc.;
Data saving: Raw measurement data and measurement images can be saved to one file;
Knoop hardness, fracture toughness: The software can be set to measure Knoop hardness or measure fracture toughness;
Other functions: include general functions such as: image capture, video capture, image processing, geometric dimension measurement, document annotation, album management, and fixed-size printing.
2. Features
After automatic or manual measurement, you can easily drag and drop with the mouse to modify,  ;Measured values and statistical results etc. will be updated automatically.
